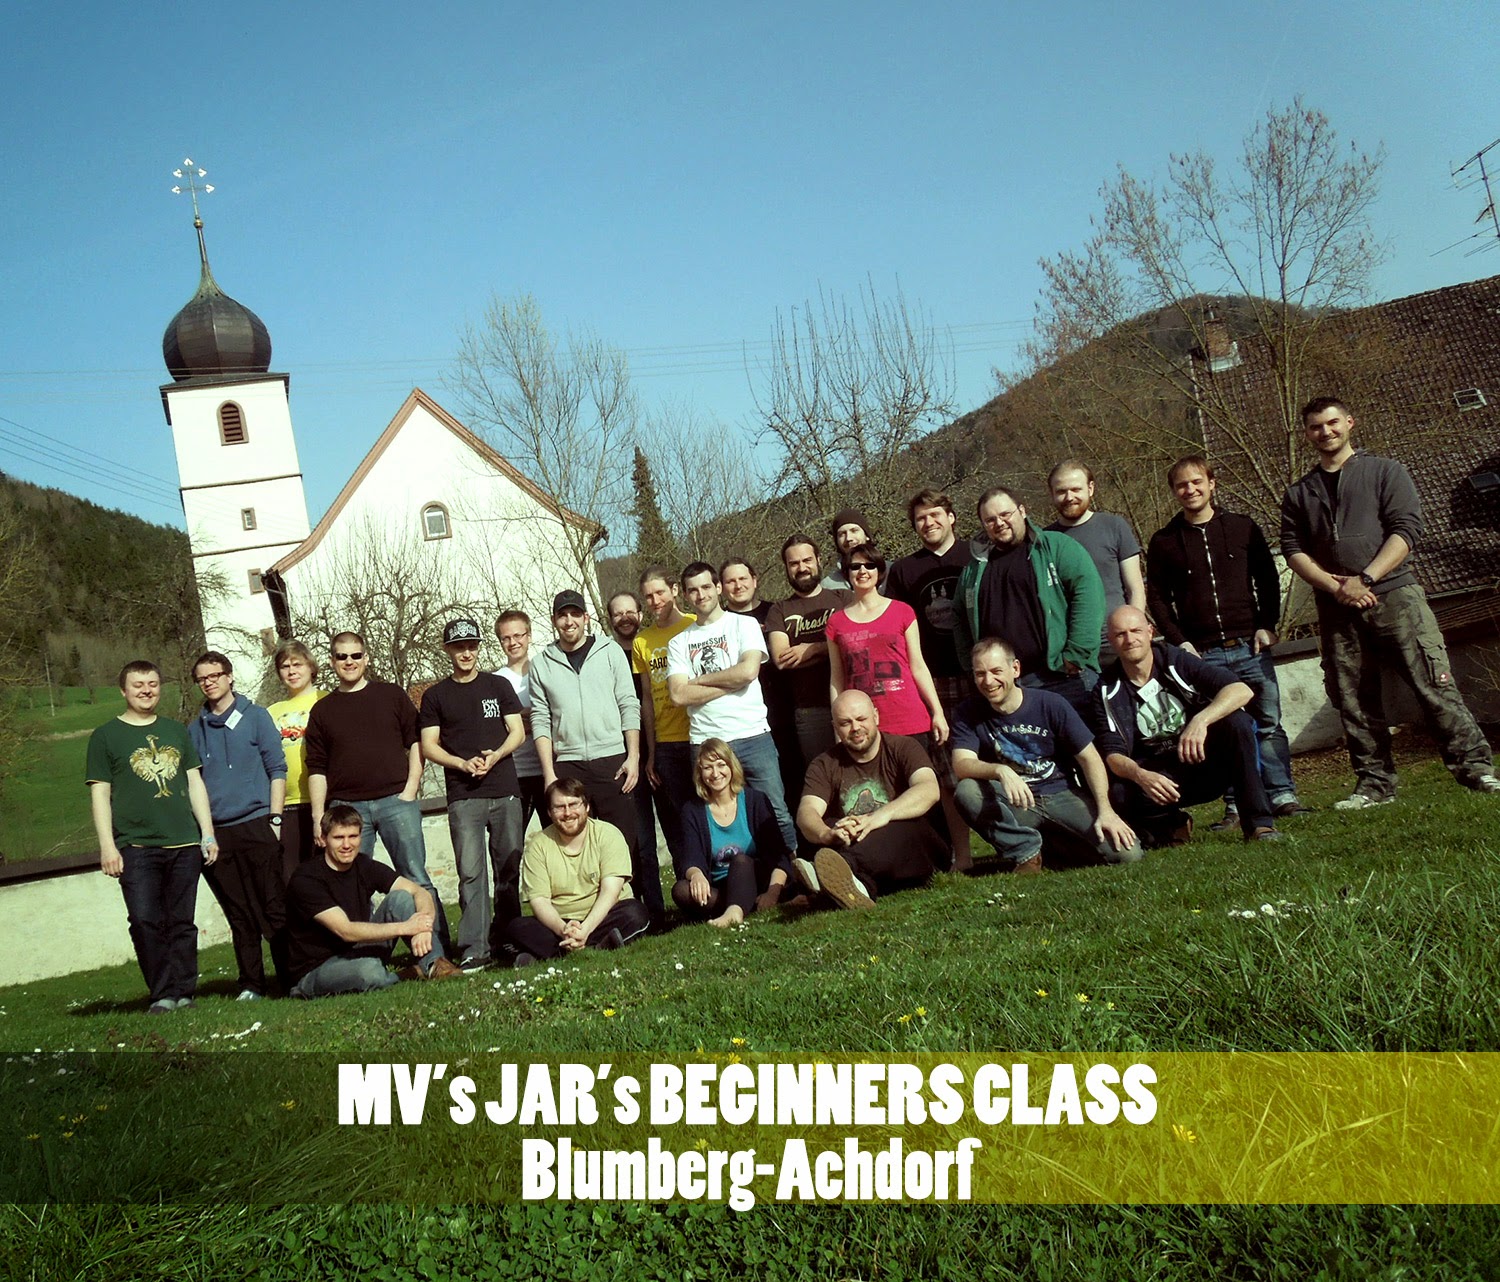
Aye,
before I start writing this monster of an article I am in need of another cup of coffee. Gotta go fast and be back in a second. I know it is stupid to write such things in here as there is not really useful content for you outthere in these words, but believe me, proper content will follow :)
BTW: Don't forget to win your BeeSPutty here!
Allright, got coffee with me, had several phone calls but now I am ready to give this article a proper write.
You decided via the last Tutorial-Voting that this article is next. It is about sculpting and Roman (me) - two things I never would have imagined coming together for real, but it did and I want to tell you how, why and what.
FOREWORD
Well, so far I did not give sculpting a really honest try. I had some fun doing some experiments with sculpting in the past, but never got sticked to it. I call myself a beginner and thought it might be interesting for many people outthere to see "how you can learn sculpting", see a way to it, see my experience I made with it. Just like I do with my painting experience - sharing it with you, so you can see the progress and follow it if you are interested in the topic.
Talking about my sculpts so far is very important too I think, so that you can see where I come from, where I start at the moment at what my actual level is. I can tell you it is low, but that is always the start when you learn something new.
I did start my way of sculpting way back in 2007 with my very first attempt during a holiday in Italy. Just took some Green Stuff with me and sculpted something I am happy to not find pictures of it. It was fun though, but without knowing how to work with tools and clay the result was kind of awkward. After this I gave a little
GW Ogre head a torso by using Green Stuff and my lack of anatomy:
2007
Later on I had several weird attempts to sculpting putty. Once I had a cool lesson from my monkeybrother Mati in Berlin. I visited him for one week of sculpting under the eyes of a pro and learned a lot. I did start to sculpt a 28 mm Zombie at his place, but never finished it and as the gods want it that way, it seems impossible for me now to find proper photos of him. So let's leave him in the past. Here is a little
Teddy-bear I sculpted. Some other sculpting attemps I found photos of:
WTF-bust?
Gorilla bust, a gift to Mati
Banana-Shark
Well, yeah, that's it. You see I never dived deep into the topic of sculpting. This has several reasons. I was always interested in it, but as my daily work is focused on painting miniatures it was hard for me to say: Ok, now I sit down and do sculpting more often to learn and improve. Never did I find the proper time and motivation. When I did some sculpting I just did it for fun, often lazy as you can see with the Banana-Shark and never with a true goal ahead.
When
Pedro Fernández Advanced Sculpting class was announced in our hometown Augsburg, early 2014 this changed. I changed. My goals changed. My motivation changed. I said to myself, let's give this a serious try and stick to it in the future.
THE PREPARATION
Well, as said I took the approaching class seriously and prepared myself. First thoughts: What do I want to sculpt in that class? Am I even an advanced sculptor? Where do I want to put my focus on? Etc.? Results of my thoughts ahead of the class:
- Sculpt something to learn most from it at my actual level, nothing too complicated
- I decided to go for a werewolve-brute to understand the use of clay, tools and anatomy volumes
That's it for my goals for the class. Keeping it simple as I know where I am on the look of my sculpting level. Before the class it was already time to think about what I will do. That's a big difference for me compared to my so far sculpting attempts: Make thoughts about my concept. So I did draw and think about werewolves ...
I did prepare a wire armature in our studio some days before the class. It was a good idea to make some drawings first to understand how I have to bend the wire. It got a little bigger than I planned in the beginning but I was happy with that as my fingers are pretty big and sculpting in a bigger scale than 28 mm makes things easier. I hoped.
The wire armature gives further sculpting work a frame, like a skeleton where I build on top. I was happy so far - before the class - how the armature already captures my thoughts from the drawings. It was placed on a piece of cork, additional to that I used some balsa wood for the areas where I want to sculpt the feet as Raffa mentioned to me that the putty will stick better to the wood instead of the cork. Important to know. I used Milliput to fix the upper torso area and also his hip
(not done on the photo yet). Now it was time to hop to the class.
I was really looking forward as getting the chance to be thaught by a master sculptor is really something special.
THE SCULPTING EXPERIENCE
Ok, the class started and there was truly a lot to learn about basic thoughts.
About the wire. A lot to learn from
Pedro.
Pedro gave us all very interesting thoughts about the pose. Don't make it too boring, bring in some action, some movement, some drama. Having a look at my wire so far I quickly saw what he meant. My wolf-skeleton would leave the sculpted wolf on top just standing there. He would just stand like ... yeah, just standing there without further purpose, not even waiting for the bus.
So it was time to change the pose. What really helped me in this task was doing the pose by myself that I wanted to achieve. I wanted to turn the pose a little bit, like the wolf heard something, got up from a dead horse he was eating, ready to check his sorroundings. So I did the same move over and over again to "feel" it and understand it better. You can even make photos of it to see them to proper use later on. I used a flat nose pliar and arm muscles to bend the wire a little different. You can see the biggest changes to the hip and the legs. Arms too, well yeah such a change puts its influance to every area.
Before - After
With the pose ready we learned how to apply Clay to it. By using a thin layer on top of the wire we prepared the basic putty to be able to stick to it. The Putty we used was grey
Super Sculpey Firm mixed with Fimo Classic No45 (50/50). Mixing these components takes a while, but it is important to mix it properly. Cool thing about that Putty is: It does not get hard by time, you have to bake it to make it hard. With the mix of the Fimo in the Super Sculpey it gets more durable, more flexible after baking, better to handle.
After the Green Stuff was applied I just put that mix on top of it without thinking to much about my wolf already. This is just to cover. Give the Putty time to connect with the Green Stuff, that means you wait a little while until the Green Stuff gets hard. If you don't wait with further sculpting progress you might rip it all of again. When the GS is dry it is connected and you can start sculpting on it.

So now was the time to place more putty on top of it. Bringing on Volumes. Pedro's words of courage: "Have respect, but no fear!" ... really helped me throwing on Volumes there. IMPORTANT: Anatomy is sooooooo important and I am not a real crack yet when it comes to that topic. So I checked the internet before the class and prepared myself with a big load of printed anatomy references. I was happy sticking smaller volumes in place ... and smooth them into the material by the use of a tool. I am still exploring which ones I prefer for that task, but I am not using too complicated ones. For example, Pedro said: sculpt as much of the first sketch as you can with your hands. I did try and it worked here and there but for some areas I was in need of the backside of a brush.


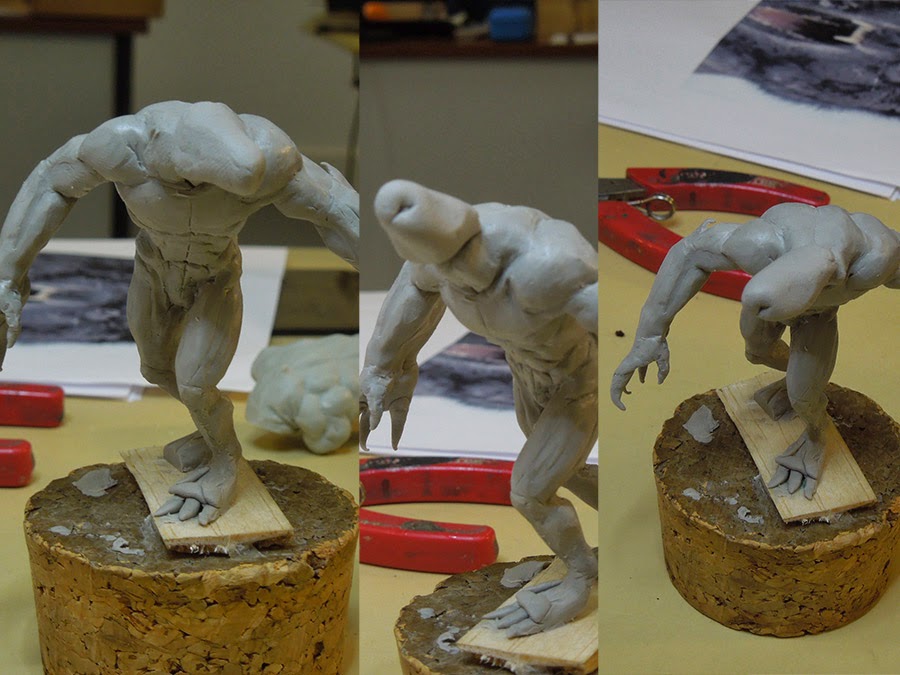
Shy I was at first and somehow - in retroperspective - I mostly concentrated on muscle areas from all that anatomy references I had. Soon my sculpt look like the brute I wanted him to be, but somehow without skin over his muscles, but happy I was so far as I did not expect such a progress. Still early WIP but a lot of fun ...
So in this stage its not about working on details. It's more about the shape and basic volumes. While I was sitting there, happy with my putty work Pedro came by and gave feedback and gave tips here and there. They were really appreciated. I told Pedro that I plan to have the sculpt not ultrarealistic, more a mix of realism and comic. So Pedro's suggestion was making his pranks bigger, this will look more powerful. As I was kind of unsure what to do Pedro "sketched" it quick at one arm. Man this changed a lot, but I liked it.
Also I was provided with the Hombre Torro Sculpt, which
Pedro sculpted to check back about my anatomy for shoulders, neck and back of a hybrid between human and animal.
So on I went amd put some volumes up to the other arm too, but for my sketch I needed a little addition: the head. Without a sketch of the head I would not know how the muscles and volumes on the back and neck would have to be placed. So it was time to check with a head-sketch:
Well, this way of sketching really helps me. I really liked the approach Pedro showed us. It is a lot of fun in the beginning, but I know that when it will come to work on the details this will be a pain in the booty as anatomy skills can not be learned in a day. It comes with practice and training, like a muscle. This reminds me of what I am teaching myself during painting class. Very similiar and very true wisdom.
I took my time to work further on my basic volumes. This is the lesson where I want to learn the most and so it is worth to put a lot of time in it. I think I was pretty quick - not perfect - but pretty quick for someone so untrained in the topic.
References, really - they are soooooooooooooooooooo important when it comes to sculpting. Not only the papers with the prints of your references, also looking at them often.
Ok. I really liked what I have done so far. It was my turn to recieve some of Pedro's great feedback and he was very honest as he saw my "head-sketch" ... I explained to him, that I am searching for the size of the head and the volumes and he just said he will help me with the "sketch". I was really impressed to look at Pedro's hands "sketching" the basic volumes of a wolf-head. I mean it left me kind of speechless seeing him doing such a sketch within several minutes. We decided to go the same way here like we did with the arm. He does one side, I try to catch the same volumes on the other side of the head. Good learning effect though.
Pedro's sketch ...
It was Saturday night when I was left alone with Pedro's sketch and I felt kind of: Man, if I leave it that way, everyone will say it was not done by me. So I decided to not work further on the head and went to something I felt comfortable with - some fur.
Then I went to the other side of the head too. Still sketching everywhere, but seeing this grow - even it is not perfect - I was happy how it evolved.
On I went with feedback of Pedro during Sunday. I was happy on how all the sculpted muscles that I did looked so far, but I knew I was still at the beginning of it all. Pedro's feedback to all my muscles was that they are ok, but I do a mistake a lot of sculptors do. I only sculpt the muscles and don't think about fat and skin on top of them. After some real-life-examples by Pedro (turkish wrestler photos,
1,
2,
3) I quickly understood what he meant. So it was time to change many things again.
I found myself very often in the middle of working on small details, smoothing them already, making them look like they were done, but well that is a big, big mistake until the basic volumes and shapes are still wrong. So, still sketching it was time to go back and put some volumes on top again:
Well above you can see the result from the weekend class. This is what I have done during the class and I learned a lot. Definatly. Pedro is a master on his own with a lot of experience and skills. It was my honour to be able to be teached by him. Thank you, Pedro for your advices and time!
I told you all that I want to take sculpting seriously from now on. Usually I would stop now, but I decided to give it more time. I decided to sculpt further on the wolf at home. I still have to seperate the studio work (painting) and my newly found hobby (sculpting) from eachother. Since the class I sculpt 4~8 hours a week for relaxation and joy, while watching a movie or a series.
So back home I got lost in references. I was browsing the web for inspiration and started new folders on my computer to have my sculpting lessons on my own still organised.
I decided to remove the fur again. It is way to early to work on that grade of detail. I removed the claws again as it was kind of impossible for me to work on his pranks while they were there.
I worked on volumes more and more and already started to prepare them for detail work, which means areas I was happy with got a little more attention than others. I realized - as a right handed person - I enjoy working on the figures left body side. It feels much more comfortable than on the other side of the figure. I prepared the volumes for the fur again, but without working on the fur structure for now. I decided to close the mouth again as I personal did not want the wolf roaring. Additional to that I reworked the size of his lower arm. It was kind of too big for me ...


I am sculpting on and on and enjoy it a lot. I also know that I am still at the beginning of making that wolf finished. Honestly I would say I am somewhere at the 30% of the complete work. And I think there is still a lot ahead of me. A lot to learn and a lot to experience ahead, but I am looking forward to finish him, even he won't be perfect in the end maybe. That is the price of learning, you are getting better by doing something and experience it. Just have a look at Raffa's sculpts, I mean they have improved too by his experience,
did they not?
I am starting to work on the facial area, but I am still not convinced of them yet.
I see the road, I walk it slow. I am getting more into the topic of sculpting as also my view on volumes changed. Usually when I look at stuff I rethink them in the way they are painted or how I would paint them, etc. Lately I am combining these thoughts of mine with how the can be sculpted, from which volumes a material consists, etc. That is pretty impressive what is going on in my head. I look at sculpts that I have in my boxes, most of them I bought because I so much enjoy the coolness of the sculpt, but sometimes when I paint them now I see "anatomy mistakes" or "lazy sculpted areas". It is not up to me to judge that as I am really a beginner when it comes to that topic but I see my eyes and brain getting teached on this subject which is nice. Learning never stops :)
I got myself a cool anatomy figure - if you like I can do a review of it and give you further informations, just let me know via comments and very important for me is to place the WIP-Wolf in Tupperware during my stops. As I don't sculpt on it that often I feel much more secure when there is no dust settling down on my putty.
So far from part A of this article series.
I hope you like it and enjoyed my journey so far.
Let me know what you think!
There will be part B for sure, but it will take its time as my sculpting skills need time to grow, as does the wolf!
Ouuhhhhhhhhhhhh!!
Roman


 Euer Job ist es mehr Roboter zu entwerfen und zu bauen!


.JPG)
.JPG)
.JPG)
.JPG)
.JPG)
.JPG)
.JPG)
.jpg)


